Physical Address
304 North Cardinal St.
Dorchester Center, MA 02124
Physical Address
304 North Cardinal St.
Dorchester Center, MA 02124
If you’re diving into web development or setting up your first server, figuring out how to install LEMP stack on Ubuntu might feel like a big leap. But trust me, it’s one of those foundational skills that pays off big time. The LEMP stack, which stands for Linux, Nginx, MySQL, and PHP, powers dynamic websites and applications with lightning-fast performance. Unlike the more traditional LAMP (which uses Apache), LEMP swaps in Nginx for its efficiency in handling high traffic.
In this guide, we’ll walk through how to install LEMP stack on Ubuntu step by step. Whether you’re hosting a WordPress site, building a custom app, or just experimenting, by the end, you’ll have a fully functional server ready to roll. I’ve walked through this setup dozens of times on various projects, and I’ll share some insider tips to avoid headaches along the way.
Why choose LEMP on Ubuntu? It’s lightweight, scalable, and perfect for modern PHP apps. Plus, Ubuntu’s stability makes it a go-to for beginners and pros alike. Let’s jump in, grab your terminal, and we’ll get your server humming in no time.
Before we tackle how to install LEMP stack, let’s make sure your Ubuntu server is prepped. Skipping these can lead to frustrating errors later, so don’t rush.
Pro Tip: Always back up your server before major changes. Tools like rsync or cloud snapshots can save your day if something goes sideways. If you are using a Cloud VM then you can also use snapshots.
Ready? Fire up your terminal and let’s update your system first. Run these commands to refresh your package list:
sudo apt update && sudo apt upgrade -yThis ensures you’re working with the latest security patches. Now, onto the fun part, installing the components one by one.
Nginx is the star of the LEMP show: it’s a high-performance web server that excels at serving static files and proxying dynamic content. Learning how to install LEMP stack starts here because Nginx will handle all incoming requests.
Install Nginx:
sudo apt install nginx -yHit ‘Y’ when prompted to confirm.
Once installed, start the service and ensure it boots on startup:
sudo systemctl start nginx
sudo systemctl enable nginx
Check if it’s running:
sudo systemctl status nginxYou should see “active (running)” in green as shown below.
akhil_u@vmzilla-07:~$ sudo systemctl status nginx
● nginx.service - A high performance web server and a reverse proxy server
     Loaded: loaded (/usr/lib/systemd/system/nginx.service; enabled; preset: enabled)
     Active: active (running) since Sat 2025-12-13 17:47:23 UTC; 1min 13s ago
       Docs: man:nginx(8)
   Main PID: 13369 (nginx)
      Tasks: 3 (limit: 4602)
     Memory: 2.2M (peak: 5.0M)
        CPU: 35ms
     CGroup: /system.slice/nginx.service
             ├─13369 "nginx: master process /usr/sbin/nginx -g daemon on; master_process on;"
             ├─13371 "nginx: worker process"
             └─13372 "nginx: worker process"

Dec 13 17:47:23 akhil-testing systemd[1]: Starting nginx.service - A high performance web server and a reverse proxy server...
Dec 13 17:47:23 akhil-testing systemd[1]: Started nginx.service - A high performance web server and a reverse proxy server.To let web traffic through, configure UFW:
sudo ufw allow 'Nginx HTTP'
sudo ufw status
This opens port 80 for HTTP. For HTTPS later, add sudo ufw allow ‘Nginx Full’. To check current ufw rules you can run sudo ufw status and see output like below:
akhil_u@vmzilla-07:~$ sudo ufw status
Status: active

To                         Action      From
--                         ------      ----
Nginx HTTP                 ALLOW       Anywhere
Nginx HTTP (v6)            ALLOW       Anywhere (v6)

akhil_u@vmzilla-07:~$Head to your server’s public IP in a browser (find it with hostname -I or curl ifconfig.me). You should see the “Welcome to nginx!” page. If not, double-check your firewall or IP.

Common Pitfall: If you’re behind a cloud provider’s firewall (like AWS or DigitalOcean), ensure port 80 is open there too. Boom! your web server is live!
With Nginx humming, it’s time for MySQL, the reliable database that stores your app’s data. This step in how to install LEMP stack is crucial for any site with user info or content.
Use below command to install MySQL database server:
sudo apt install mysql-server -yStart and enable it:
sudo systemctl start mysql
sudo systemctl enable mysqlDon’t skip this, unsecured databases are hacker bait. Run the security script:
sudo mysql_secure_installationFollow the prompts:
Would you like to setup VALIDATE PASSWORD component? y
Please enter 0 = LOW, 1 = MEDIUM and 2 = STRONG: 1
Remove anonymous users? y
Disallow root login remotely? y
Remove test database and access to it? y
Reload privilege tables now? y
By default, Ubuntu’s MySQL uses auth_socket for root, meaning you log in with sudo mysql (no password needed locally). For app connections, we’ll create users with passwords later.
Log into your MySQL database server:
sudo mysqlType exit to leave. If that works, you’re golden.
Tip: If you’re using older PHP code, note that some libraries prefer mysql_native_password over the default. We’ll handle that in the optional database test.
PHP brings your site to life, processing scripts and talking to MySQL. In how to install LEMP stack, PHP-FPM (FastCGI Process Manager) is key for Nginx integration. It’s more efficient than mod_php in Apache setups.
For Ubuntu 24.04 use below command:
sudo apt install php8.3-fpm php8.3-mysql -yThis grabs PHP-FPM and the MySQL module for database chats.
Start and enable PHP-FPM:
sudo systemctl start php8.3-fpm
sudo systemctl enable php8.3-fpmVerify PHP version using below command:
php -vOutput:
akhil_u@vmzilla-07:~$ php -v
PHP 8.3.6 (cli) (built: Jul 14 2025 18:30:55) (NTS)
Copyright (c) The PHP Group
Zend Engine v4.3.6, Copyright (c) Zend Technologies
    with Zend OPcache v8.3.6, Copyright (c), by Zend Technologies
Check PHP FPM status:
sudo systemctl status php8.3-fpmOutput:
akhil_u@vmzilla-07:~$ sudo systemctl status php8.3-fpm
● php8.3-fpm.service - The PHP 8.3 FastCGI Process Manager
     Loaded: loaded (/usr/lib/systemd/system/php8.3-fpm.service; enabled; preset: enabled)
     Active: active (running) since Sat 2025-12-13 18:19:14 UTC; 1min 17s ago
       Docs: man:php-fpm8.3(8)
   Main PID: 23789 (php-fpm8.3)
     Status: "Processes active: 0, idle: 2, Requests: 0, slow: 0, Traffic: 0req/sec"
      Tasks: 3 (limit: 4602)
     Memory: 7.6M (peak: 8.4M)
        CPU: 73ms
     CGroup: /system.slice/php8.3-fpm.service
             ├─23789 "php-fpm: master process (/etc/php/8.3/fpm/php-fpm.conf)"
             ├─23790 "php-fpm: pool www"
             └─23791 "php-fpm: pool www"

Dec 13 18:19:14 vmzilla-07 systemd[1]: Starting php8.3-fpm.service - The PHP 8.3 FastCGI Process Manager...
Dec 13 18:19:14 vmzilla-07 systemd[1]: Started php8.3-fpm.service - The PHP 8.3 FastCGI Process Manager.
You might want extras like php8.3-curl or php8.3-xml for full-featured apps—install them as needed with sudo apt install.
Quick Note: PHP 8.1+ has strict typing and better performance, but if your code is legacy, test for compatibility.
Now the magic: linking Nginx to PHP-FPM so it can process .php files. This is where many stumble in how to install LEMP stack, but follow along, and it’ll click.
Let’s set up a site directory (replace example.com with your domain):
sudo mkdir -p /var/www/example.com/html
sudo chown -R $USER:$USER /var/www/example.com/htmlCreate a config file:
sudo vim /etc/nginx/sites-available/example.comPaste this (adjust paths and domain):
server {
    listen 80;
    server_name example.com www.example.com;
    root /var/www/example.com/html;
    index index.html index.htm index.php;

    location / {
        try_files $uri $uri/ =404;
    }

    location ~ \.php$ {
        include snippets/fastcgi-php.conf;
        fastcgi_pass unix:/run/php/php8.3-fpm.sock;
    }

    location ~ /\.ht {
        deny all;
    }
}
Save and exit. Then run below command that creates a symbolic link (symlink) so that Nginx will activate a site configuration.
sudo ln -s /etc/nginx/sites-available/example.com /etc/nginx/sites-enabled/Test config:
sudo nginx -tOutput:
akhil_u@vmzilla-07:~$ sudo nginx -t
nginx: the configuration file /etc/nginx/nginx.conf syntax is ok
nginx: configuration file /etc/nginx/nginx.conf test is successful
Reload Nginx:
sudo systemctl reload nginxAdd a simple HTML file:
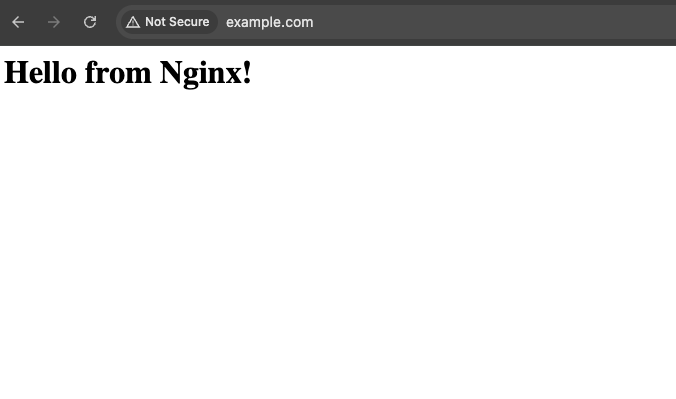
echo '<h1>Hello from Nginx!</h1>' | sudo tee /var/www/example.com/html/index.htmlVisit http://example.com, you should see the message.
Security Heads-Up: The deny all for .ht blocks protects against Apache-style config leaks. Always set 644 permissions on files: chmod -R 644 /var/www/example.com/html.
Tip: The domain example.com (Your domain) should be pointed to the server IP for you to be able to access the web page using the domain
Time to confirm PHP works. Create a test file:
echo "<?php phpinfo(); ?>" | sudo tee /var/www/example.com/html/info.phpBrowse to http://example.com/info.php. You should see a colorful PHP details page. If it’s downloading as text instead, check your Nginx config’s location ~ \.php$ block.
Important: Delete this file ASAP sudo rm /var/www/example.com/html/info.php. It spills server secrets like module versions.
If you hit a 502 error? Restart services (sudo systemctl restart php8.3-fpm nginx) and check logs with sudo tail -f /var/log/nginx/error.log.
Want to verify your full LEMP stack on Ubuntu handles database queries? Let’s build a quick test.
Log into MySQL:
sudo mysqlRun these (replace strongpassword):
CREATE DATABASE example_db;
CREATE USER 'testuser'@'localhost' IDENTIFIED WITH mysql_native_password BY 'strongpassword';
GRANT ALL ON example_db.* TO 'testuser'@'localhost';
FLUSH PRIVILEGES;

USE example_db;
CREATE TABLE todos (id INT AUTO_INCREMENT PRIMARY KEY, task VARCHAR(255));
INSERT INTO todos (task) VALUES ('Learn LEMP stack'), ('Deploy my app');

SELECT * FROM todos;
EXIT;
Creating a PHP Test Script
sudo vim /var/www/example.com/html/todo.phpAdd below code to the file:
<?php
$servername = "localhost";
$username = "testuser";
$password = "strongpassword";
$dbname = "example_db";
try {
$pdo = new PDO("mysql:host=$servername;dbname=$dbname", $username, $password);
$pdo->setAttribute(PDO::ATTR_ERRMODE, PDO::ERRMODE_EXCEPTION);
echo "<h2>Database Connection Successful!</h2>";
echo "<p>Your todos:</p><ul>";
foreach ($pdo->query('SELECT * FROM todos')->fetchAll() as $row) {
echo "<li>" . htmlspecialchars($row['task']) . "</li>";
}
echo "</ul>";
} catch(PDOException $e) {
echo "Connection failed: " . $e->getMessage();
}
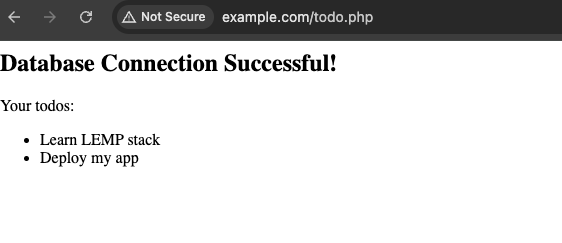
?>Visit http://example.com/todo.php. See your todos? Success! Clean up by dropping the DB if testing only: DROP DATABASE example_db; DROP USER ‘testuser’@’localhost’;.
Even pros hit snags. Here’s how to fix the usual suspects when installing LEMP stack:
Logs are your friend: journalctl -u nginx or MySQL’s error log at /var/log/mysql/error.log.
Congratulations! You’ve just mastered how to install LEMP stack on Ubuntu from scratch. You now have a robust setup for PHP-driven sites, complete with Nginx’s speed, MySQL’s reliability, and PHP’s flexibility. This stack scales effortlessly—think high-traffic blogs or APIs.
Next steps? Secure it with Let’s Encrypt SSL, optimize with caching plugins, or deploy a CMS like Laravel. If you’re on a VPS, monitor with tools like Netdata.
Got questions or tweaks for your setup? Drop a comment below—I’d love to hear how it went. Happy coding!